Prefer to use your phone? Check out the guide for using The Meticulous Puffin from your phone.
Bringing soft-copy images of precious moments to life through frames shouldn’t be complex, and with The Meticulous Puffin, you can ensure that.
This step-by-step guide will walk you through how to frame your digital photo on The Meticulous Puffin using your computer.
Step 1: Download Your Image from Google Photos and Apple iCloud Photos
If you use an Android device to take photos, your images will automatically get uploaded to Google Photos. To access the image you want to frame, sign in to https://photos.google.com/.
Once there, search for the image you want to frame on themeticulouspuffin.com and select it. When it opens, click the three-dot icon in the upper right corner of the picture and select download.
If you use an Apple device, go to https://www.icloud.com/photos and sign in using your Apple ID and password. Next, click on Photos and choose your desired image or library.
You can choose more than one photo by holding down the Command Key on Mac or the Ctrl key and clicking. After selecting your preferred images, click the download button (it looks like a cloud with a downward-facing arrow) located at the upper right corner of the top toolbar. Next, choose if you want to download the unmodified original or the most compatible version, then tap download.
Step 2: Select Your Desired Product
Head over to themeticulouspuffin.com homepage and select your desired product. We’ll use the Essential Framed Print from the homepage for this example shown below:

Step 3: Customize Your Frame
Next, you need to customize your frame. To do so, select a Mat Border or Edge-to-Edge Print for your frame. In the screenshot below, we choose the Mat Border option.

After this, choose your print size, which can either be Landscape, Portrait, or Square. All three options have different sizes. For example, the Landscape print size option has frames from 7 x 5 inches to 36 x 24 inches, while the Portrait size has frames from 5 x 7 inches to 24 x 36 inches. In the image below, we choose the 7 x 5 inch print size for Landscape.

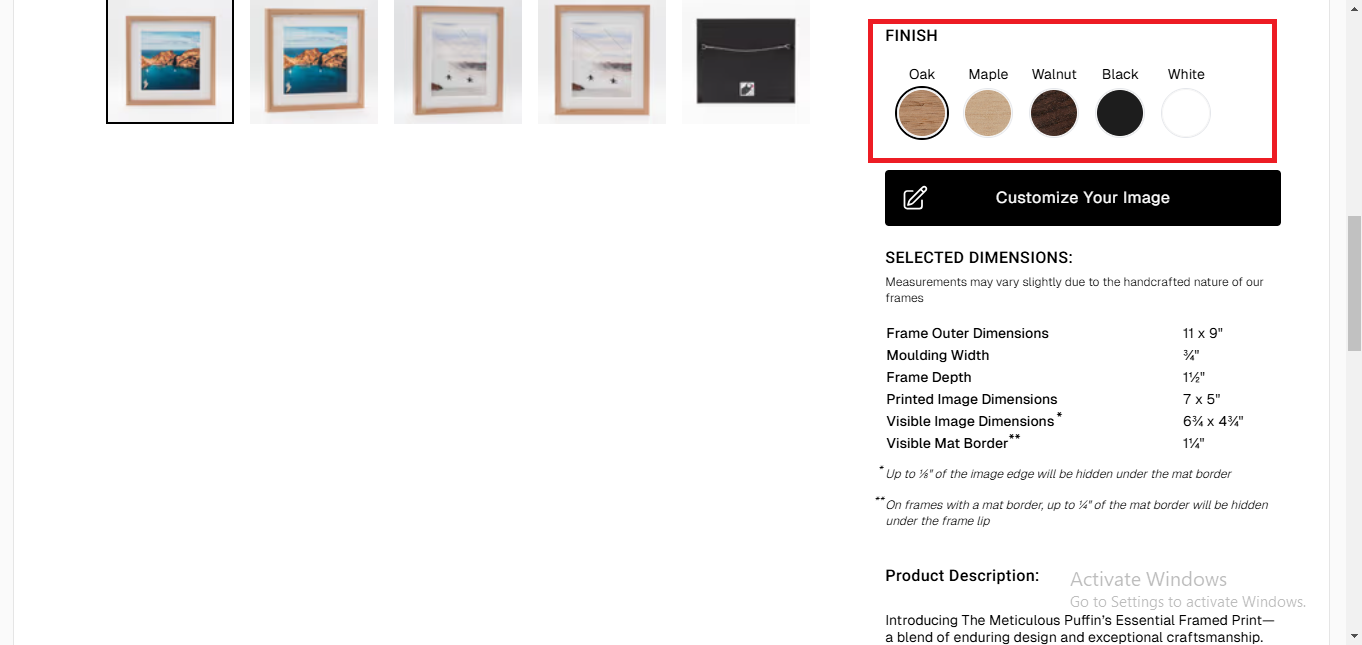
Below print size, you will find the Finish section that allows you to choose the finishing of your frame. You can choose from more than four finishing options, including Oak, Maple, Walnut, Black, and White. To choose an option, simply tap on it using the mouse pointer.
Step 4: Upload Your Image
You can upload and customize your image by clicking the Customize Your Image button located beneath the Finish section.

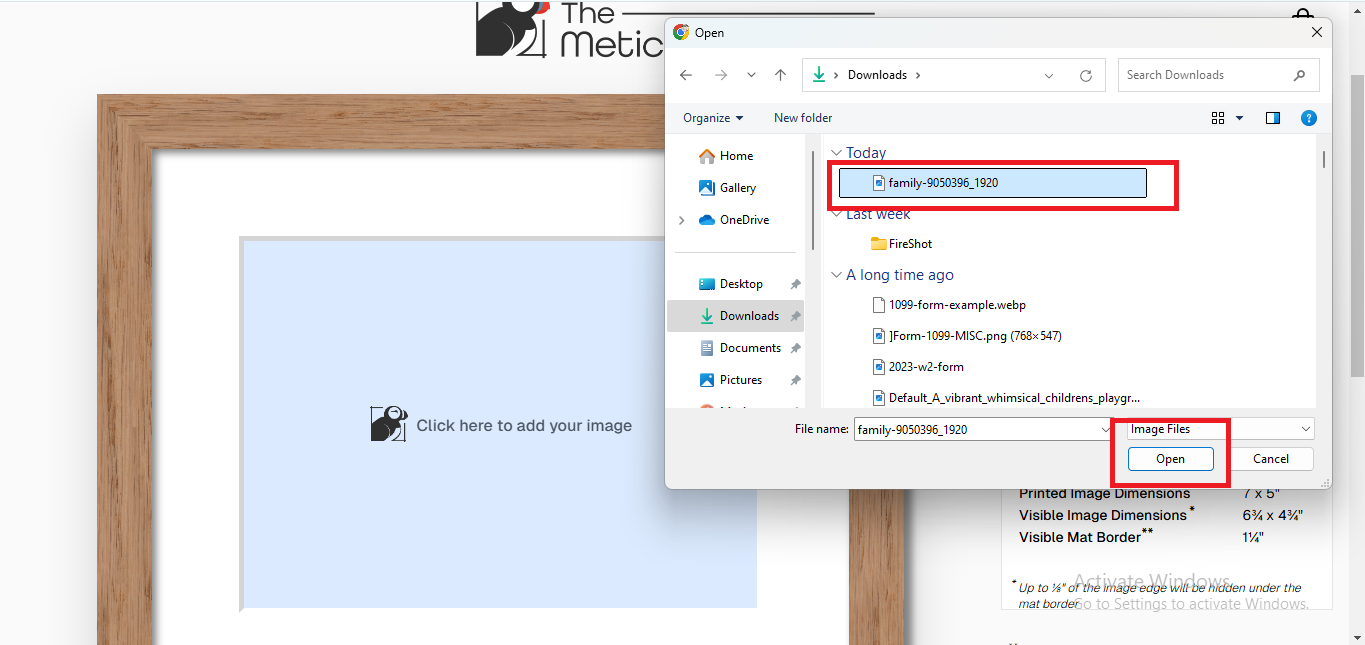
After clicking the Customize Your Image button, you will be redirected to a new page. On the new page, tap the icon that says “click here to add your image”. Note that right beside it you can see the details of your frame including dimensions, border type, and selected finish.

This will open up your computer’s file manager. Select the image you want framed, then click Open.
Step 5: Customize Your Image
Your uploaded image will open in the editor, where you can crop, rotate, scale, fine-tune, add filters, and add digital borders to the picture. You can also use settings like brightness, contrast, saturation, exposure, temperature, etc, of the image.
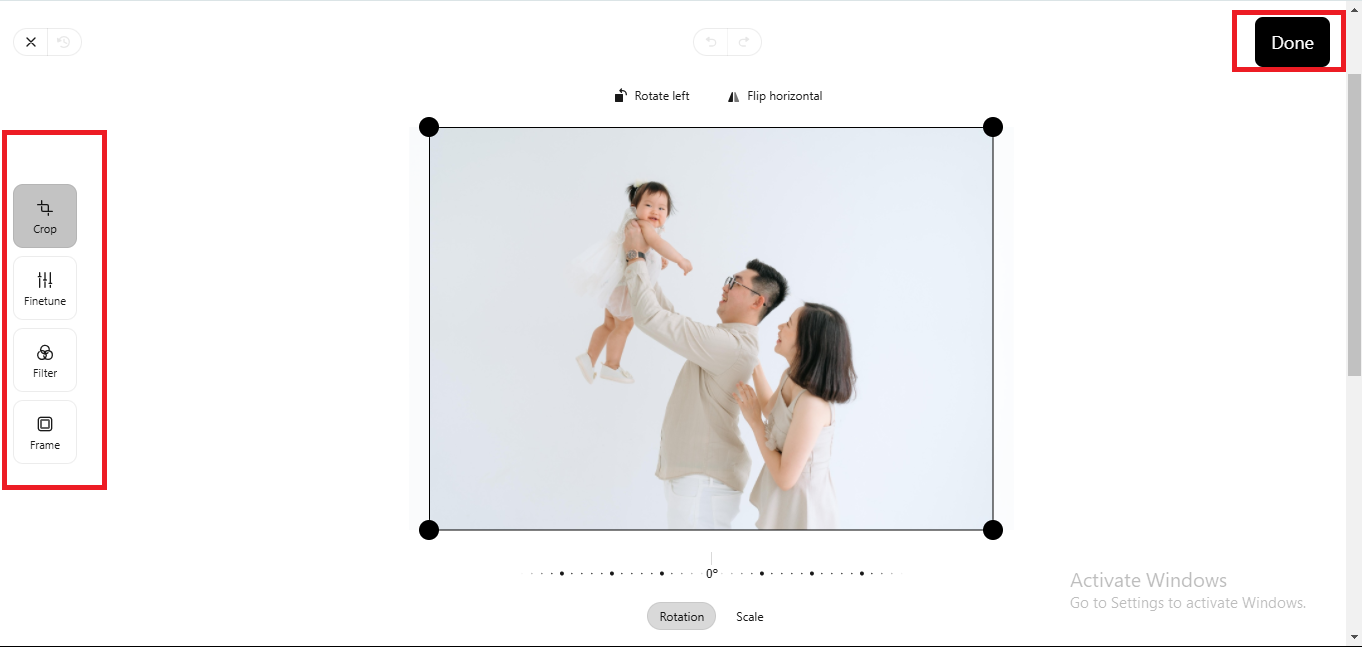
Once you are through optimizing the image, click the Done button located at the upper right corner of the editor.
Step 6: Add to Cart
Lastly, check the bottom left box tagged ‘Print Quality’ and ensure that it says “Excellent” or “Good” to ensure that the resolution of your uploaded image is good. If the Print Quality is anything other than “Good” or Excellent,” we recommend replacing the image with another of a higher resolution or selecting a smaller frame. Once that is done, click the Add to Cart button.

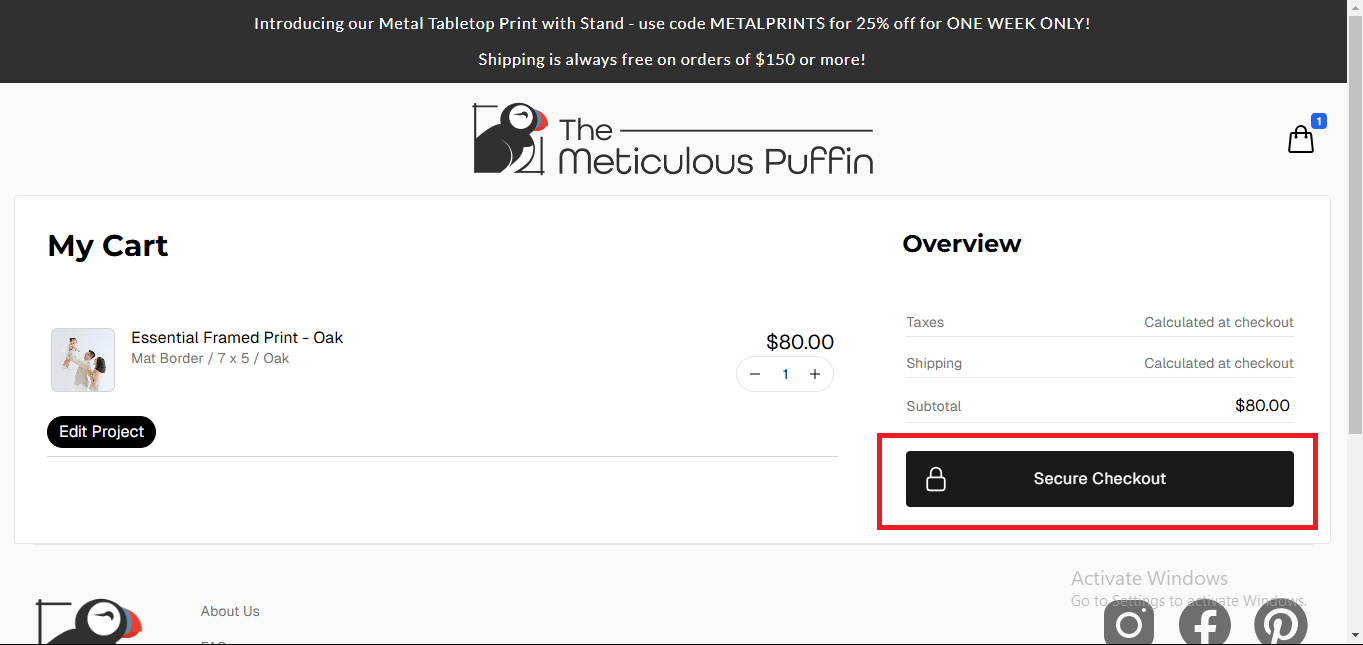
You will see a Processing Image popup. Wait until it is through, then click Secure Checkout to finalize the order.
Congratulations! You have successfully framed your digital photo in a few minutes using The Meticulous Puffin.

Leave a reply to How to Frame a Photo with The Meticulous Puffin from Your Phone – The Meticulous Puffin Blog Cancel reply